Friday, May 22, 2009

Outdoor Entertaining 101, part 3

I know, I said "tomorrow" and it is more like "next week" but with a party to prep I chose cleaning the house over blogging. Shame on me. I did make it up to you though- I have recipes! And photos of the recipes. (Seriously, am I the only one that only likes to make food I can see first? I also order the items off of the menu that have pictures. That's not weird, is it?)

So, lets kicks this off. This first salad is a great one visually because it is so colorful. My family also like the sweetness of it which really sets it apart from any other salad I've had. I think it is also a great way to sneak some veggies to kids. ;)

Sweet Veggie Pasta Salad

Ingredients:
1 16oz package of pasta (any kind, but I like farfalle aka bowtie pasta)
1 small head of broccoli, cut into bite-size pieces
1 small package of baby carrots, cut into bite size chunks
2 sweet bell peppers (I like doing red and yellow for color), cut into bite size pieces
Cilantro
Salt & Pepper
2 cups rice wine vinegar
2 cups sugar
2 cups light olive oil

Directions:
1. Cook your pasta according to package directions until it is al dente (slightly undercooked). Adding a splash of olive oil to the cooking water will keep your pasta from sticking together.

2. Toss your cooled pasta in a large bowl with broccoli, peppers, and carrots. Add cilantro and salt and pepper to taste.

3. In a small bowl wisk together equal parts rice wine vinegar, sugar, and olive oil. (Or, put in a martini shaker and shake it up) Pour this over your pasta until it is saturated and allow the salad to sit for at least an hour before serving. Keep the extra dressing in the refridgerator for leftovers to moisten dry salad. (Over time your pasta will soak up the dressing, leaving it feeling dry)


Ok, admittedly I don't eat this next salad (anymore) because it does have meat in it, but the men love it and there are some vegetarian substitutions I do use when it is just me and hubby.

Italian Pasta Salad
Ingredients:
1 16oz package of pasta (any kind works, or mix two smaller packages for a variety)
1 small package of pepperoni or little smokies, cut into small pieces
1 small package of cubbed ham
1 block of soft cheese, like gouda or mozzarella, cubbed
2 cups of shredded cheese, like chedder or pepper jack
1 small can of sliced olives
2 bottles of Italian salad dressing

Veggie Options:
To make this vegetarian, replace the meat with...
1 can of artichoke hearts
2 cups of button mushrooms, sliced

Directions:
1. Cook your pasta according to package directions until it is al dente (slightly undercooked). Adding a splash of olive oil to the cooking water will keep your pasta from sticking together.

2. In a large bowl, add together cooled pasta, cheese, meat, and olives. Toss until they are combined well.

3. Pour one bottle of Italian dressing over the salad until it is saturated and toss the salad together again. Keep the extra dressing in the refridgerator for leftovers to moisten dry salad. (Over time your pasta will soak up the dressing, leaving it feeling dry)


Easy enough, right? Both salads are simple to make and great hits at our BBQs. The great thing about them is that they can withstand the heat of a hot summer day without risking food poisioning. Although they are better chilled, I don't have to worry about Mayo or Eggs in anything getting too hot or sitting out.

Before I leave you today I am going to share a simple dessert recipe. I like to serve dessert at outdoor parties, and while s'mores are a favorite not everyone has a place to light a fire. In lieu of (or in addition to) s'mores I like to serve bite-sized finger food desserts. Here is a simple one to make, but oh-so-delicious.

Bite-Size Mini Cheesecakes
Ingredients:
1 box of brownie mix
1 box of no-bake cheesecake mix
1 carton of fresh berries or topping of your choice

Also need:
Mini muffin pans
Measuring spoon or melon baller
Pastry/Piping Bag (optional)
Mini muffin pan liners
Directions:
1. Prepare your brownie mix according to box directions. Spoon approximately 1 tablespoon of mix into muffin tins lined with paper liners.

2. Bake brownie cups at 350 F approximately 15 -20 minutes until a toothpick inserted into the center comes out clean. Don't burn or overcook these- they should be moist.

3. Press a measuring spoon or mellon baller into the center of brownie to create a sort of cup. Remove the papers from the brownies as soon as they are cool enough to handle. Waiting too long may make this difficult! Be gentle with them so you don't crush your cups. Set these aside.

4. Allow your muffin pans to cool and line with more papers.

5. Prepare crust mix for cheesecake according to package directions. Spoon 1-2 tablespoons of crust mixture into each paper and press with your fingers until you've created a mini pie shell in each cup.

6. Prepare cheesecake filling according to package directions. If you are using a pastry bag, spoon the filling into the bag and pipe it into the pie shells and brownie cups, otherwise spoon a generous dollop of filling into each cup.

7. Top with your choice of berry (or try bits of fun-size candybars, butterscotch chips, lemon filling, or candied pecans). Press gently into the cheesecake filling, but don't squash your berries!

8. Refridgerate at least one hour and peel papers off before serving. Caution: These are addictive!

Friday, May 15, 2009

Outdoor Entertaining 101, part 2

Continuing on with my tips and tricks for your great outdoor parties this summer (Did I really just say that? Seriously, where has the time gone?) , here is edition #2 with some party prep ideas.

I have a huge family so one of my biggest challenges with outdoor entertaining is rounding up enough seating for the whole family. I think this is important because it is extremely difficult to stand and eat a meal at the same time, and although my patio table seats 6 that doesn't even cover my immediate family. The best way to deal with this is to send out an invitation- BYOC (Bring Your Own Chair) or thrift some odd chairs and benches to have handy for a large group. If you're really wanting something unique, spray paint mismatched chairs bright colors and pair with a card table covered with a vintage oilcloth table cover- kitschy fun and useful! Check out this dining room on Apartment Therapy's Re-Nest for ideas.

Especially on hot days, you're going to go through a lot of drinks. Keep your guests hydrated while keeping your sanity by prepping several pitchers of iced tea ahead of time and stashing them in the refridgerator. I love Liptons Cold Brew iced tea because when you're low on drinks, this stuff brews at lightning speed in the fridge. To sweeten your tea, ditch the sugar packets or messy loose sugar and prep some simple syrup ahead of time. (Boil equal parts sugar and water in a saucepan, and simmer on medium-low for 8 minutes. Cool and transfer to a container) I put mine into recycled glass bottles or oil and vinegar bottles from the dollar store. Get creative and flavor some of your syrups by adding mint, lemon, or fruit into the pan when your boil it. Be sure to strain it before adding to your shaker. Label them with a paper tag and ribbon.
Glass Oil Bottles by allJeweledup

If you are serving sodas or bottled drinks, make sure to keep your recycling bin in plain sight so your guests will recycle. It not only cuts down on the amount of garbage your throw out, but you're making less of an envioronmental impact that way. Remember that aluminum foil is recycleable too- so if you're using it on the grill rinse it well and stick in in with your cans. Check the recycling code on your plastic cups and party ware with your local waste management's approved recycleable items.

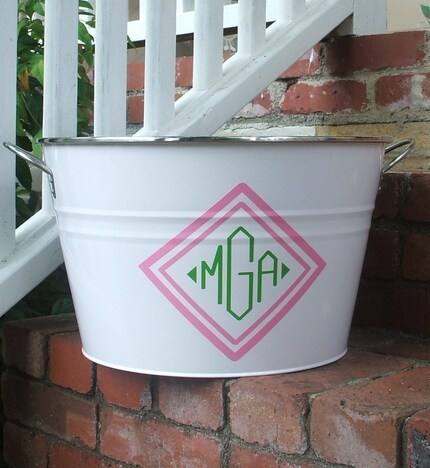
Nothing ruins a good party like food poisoning, so make sure you keep your foods cool. Large tin buckets are available and home improvement stores and can be filled with ice to place your drinks or salads in. And to drop the temp quickly on luke warm drinks or food, add some salt to your ice. It will react with the ice and make the ice water colder. Just be sure to have more ice on hand to replace what's in the bucket once it melts. You can even dress these up with vinyl decals on the outside or by sticking pinwheels in the ice.

That's it for today- I have some party planning and yardwork to do myself. Enjoy your parties, and see you tomorrow with more tips. Ciao.

Thursday, May 14, 2009

Outdoor Entertaining 101, part 1

Let me first start by explaining that you can blame my hiatus on my garden. You see, in Spokane (where I live) Spring is really just a combination of all the seasons- sometimes occurring in one day. So between the thunderstorms, heatwaves, frost-overs, and crisp breezy days I have had to make the most out of every yard work opportunity, and some not so opportune days as well. It has been worth it though, and I have a lovely new patio to show for it. Outdoor party here I come!

I think we are programmed as children to look forward to summer all year long, and the first glimmer of sunshine I put together our new 2 person hammock and made a big old pitcher of iced tea. With the forcast set to be in the 80's and two family birthdays this week it was the perfect excuse to host my first outdoor party of the year.

Ok, I have to admit that although I am calling this upcoming weekend my first outdoor party of the year, it really isn't. Last Saturday was so nice it seemed to be the day of impromptu drop ins. Well my mother raised me right (or tried to anyhow) and at the end of the evening when 6 people and an adorable pitbull/boxer mix (Gilbert!) remained I fired up the BBQ and sent my sister to the store for some last-minute salads and we had a lovely, although chilly, outdoor dinner.

But this weekend I am going all out with the party planning and I thought I would pass along my tips and recipes so you have some new ideas in your arsenal of outdoor entertainment. Memorial day weekend is just 9 days away- are you ready? To start out, I'm going to share my Etsy picks for the perfect outdoor party. Tune in over the next several days for my ideas on recipes - including vegetarian options for the BBQ- and hostess tips and tricks. So without further ado, your essential Etsy picks for outdoor entertainment:


P.S. I cannot leave without urging everyone in the Spokane/Cheney area to drop in to EWU's BFA (Bachelor of Fine Arts) show that is up in their gallery right now. The paintings by Keshia Weaver-Wright will knock your socks off, and all the work in the show is for sale. If you want info on the show I'll gladly email it to you. Look for an artist interview and a feature on Keshia's work in the future.